A picture-less post!
As we get to a point where the end of the project is in sight, we can begin to calculate exactly how much Sam has saved us by doing so much of the work himself. When we first embarked on this project, he did a lot of research on costs, not only by interviewing several General Contractors, but also by doing quite a bit of research on the internet.
One of the websites he found rather useful was remodelingmyspace.com, where they have a bunch of useful tips, how-to articles, and (especially useful) a project cost-estimator . (And where, if you haven't already, you can vote for this blog to win a remodeling-blog contest!)
Sam has figured that by doing it all himself, he's been 'making' about $300 an hour! When we spoke with contractors, we were quoted a project price of $500-600 thousand. And of course, that wasn't inclusive of lifts and all the crazy detail work in the garage, and all of the amazing details like angled windows and such... not to mention the quality work that Sam does vs. what contractors would do. (Not to suggest that there aren't great contractors out there, but I doubt they'd 'care' as much as Sam does, and Sam has consistently gone the extra mile. Just sayin'.)
Sam figures that, including permits, architect fees, the two lifts in the garage, and everything else that we've done so far, we've spent about $56 per square foot (including decks and garage). If we look at just the interior and the garage, that price goes up to $63 per square foot. If we look at just the interior square footage (still including everything), we're still only at about $100 per square foot (and I don't know that it makes sense to exclude the 1300 sq. ft of the garage!).
Even at $100 per square foot, we're still a far cry from the $250 and up that we were quoted, for interior only. Of course, if it had been me doing the work instead of Sam, it might not have been such a deal! :P
That's why I take pictures, instead.
This morning we lifted into place the other 20ft. wall. Pictures of that soon!
Tuesday, July 31, 2007
Friday, July 27, 2007
What a difference a month makes!
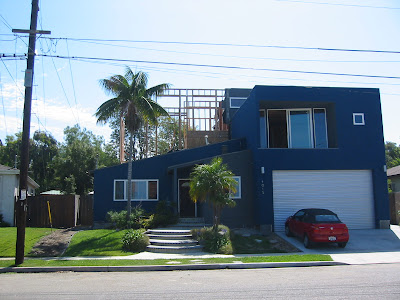
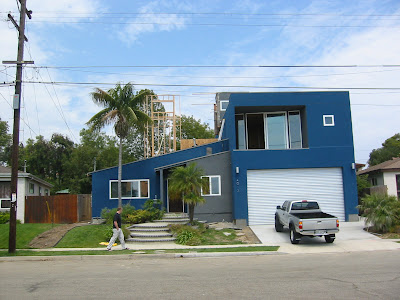
My goodness it's hard to believe it's been only a month since I last posted- so much has happened! As you look at the outside of the house today, you notice some differences: Sam has made great progress on the framing for the last part of the house that will contain the staircase and the cupola, we have a driveway, and although you can't see it in this picture, I can now park in the garage, because all the wood that used to be in 'my' spot has been used up!
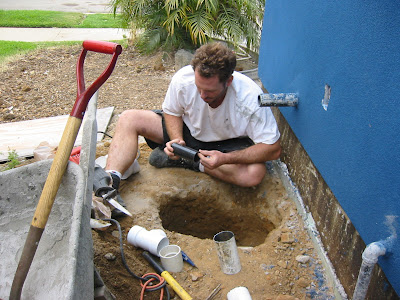
Back at the beginning of July, Sam had to spend a fair amount of time digging in the dirt, getting the drains placed, in preparation for the pouring of the walkway on the side of the house. These drains will collect the rain water that gushes out from those pipes on the side of the house (which is from the roof!).
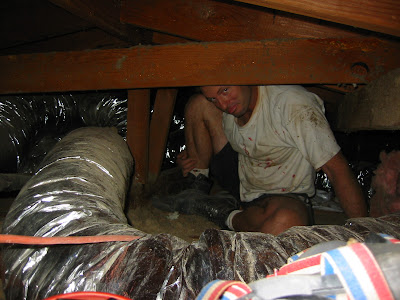
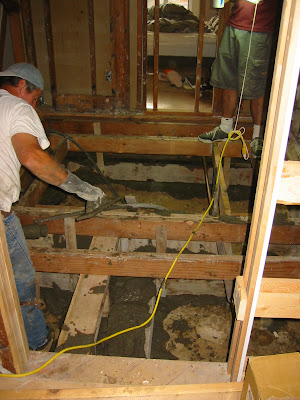
He also had to spend a lot of time doing his other least favorite thing: climbing around in the rafters, reattaching vents and reorganizing wires...
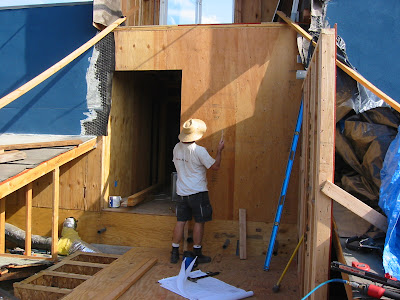
But he also got to do some more fun stuff. The day after reading a book on "how to build stairs"... he built stairs! These get you up to the bathroom from the garage....
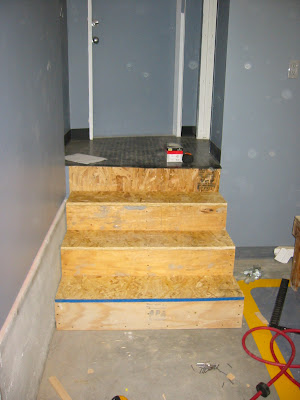
... and these get you into the house!
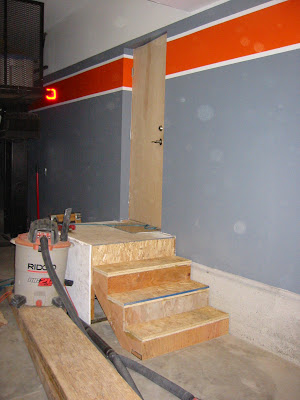
Sioux took to them immediately.

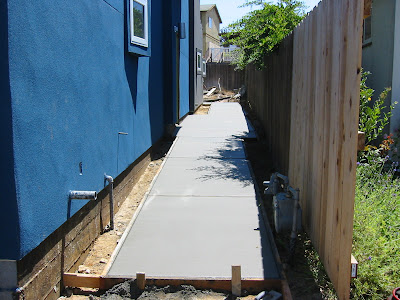
After Sam had the drains all set, the concrete guys set forms for the remainder of the foundation work inside the house, as well as for walkway...
 ... and then they started pouring concrete!
The walkway on the side of the house is cool... is has jags in it that mirror the angles of the house itself, and we'll be putting river rock in the empty spaces ...
After the foundation was poured, Sam got to (finally!) put (sub)floor back in the living room.
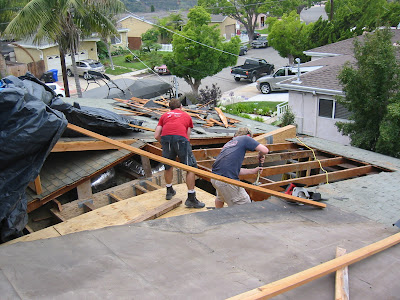
 And then one day he said "honey, I think I'm going to cut a big hole in the roof."
And he did!
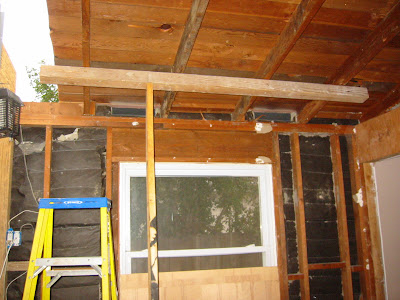
He started by creating a support for the bit of roof that was to remain...
... and then started cutting boards with his magical Sawzall, and pulling 'em off...
 A lot of light started streaming into the living room!
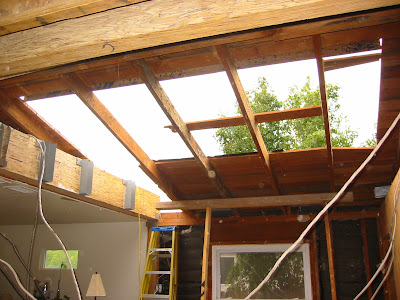
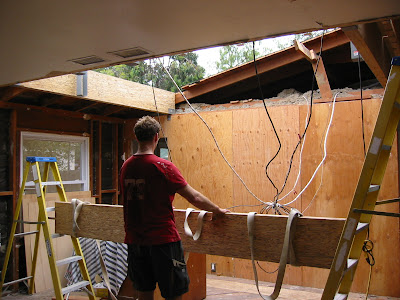
As a final step, he and Nathan removed the beams that had supported the roof, leaving us with a spectacular (temporary!) skylight! Thank heavens we live in perennially sunny San Diego!
Next step was to haul into place (and I do mean haul) the big parallams that had been taking up 'my' space in the garage! Sam came up with an ingenious new way to do this: First, they got it placed on a couple of ladders...
 ... then they put a strong tow-strap around it, and they lifted it- slowly and carefully- into place!

(I'm making all of this seem easier than it was, because I have more than a month of information to cover. As an example, I have about 15 pictures of them getting it from the previous picture to the next one. It was hard work.)

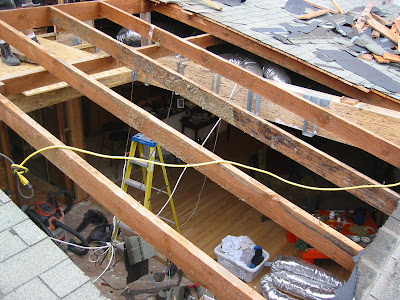
Once that first one was in place, Sam nailed a bracket onto it (visible in the next picture), and they got ready to lift another one...

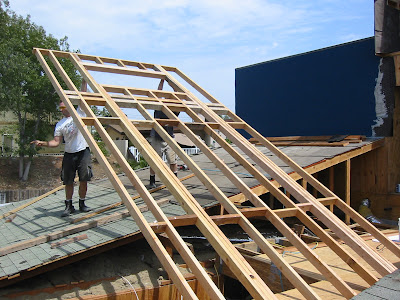
... and once that was done, Sam nailed into place all the mini-beams, which will be part of the ceiling of the living room once they're drywalled. We could really begin to get a sense of how spacious and open the living room is going to feel....
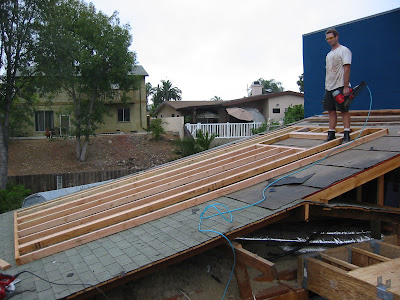
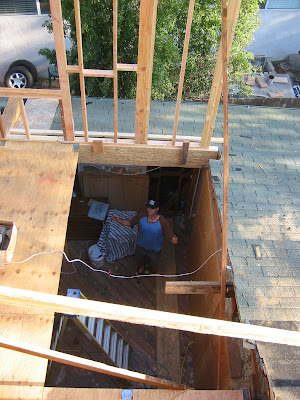
 When I came home from school the next day, Sam had thrown some boards on top of all those beams and was standing up there, on the second floor above the existing house! Just behind him on the right is where the laundry room will be, and on the left is the entry to where the bedrooms are.
 This is a picture of him standing in pretty much the same place, once the tarps were removed. Once he had someplace to stand, he was back to framing. First, he built, and put into place, a part of the wall of the laundry room (on the far right in this next picture)...
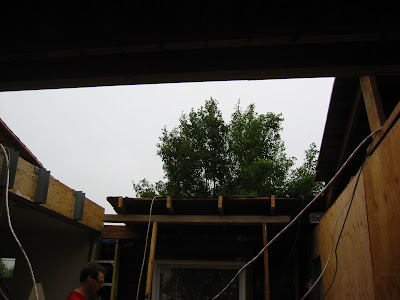
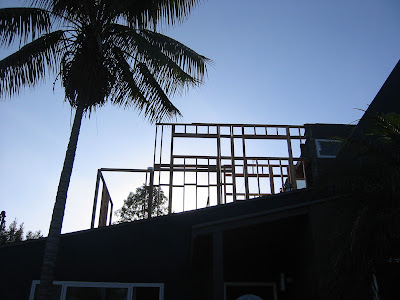
Then, he attacked a 20-foot wall for the staircase & cupola. Here it is almost all finished... but he needed some help in order to stand it up!
Luckily the next day Nathan was there, and he helped Sam unload a bunch more wood from Home Depot...
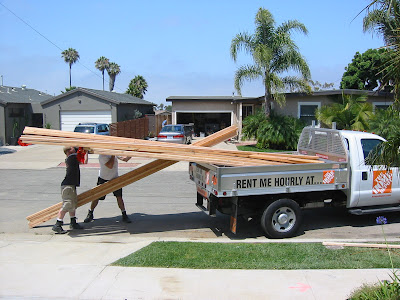
... and then Sam's brother OJ showed up just in the nick of time. I think he had been anticipating a more social visit, but Sam put him right to work!


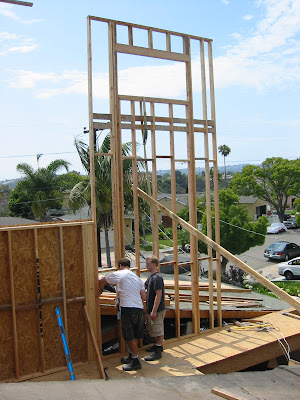
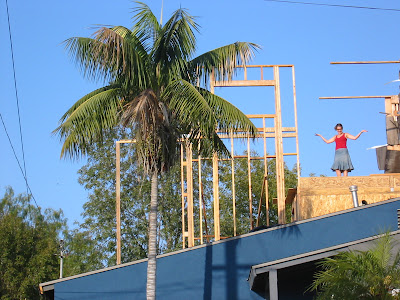
That is a tall wall!!! We crossed the street to view and admire it from a distance...
(you can click on the picture to make it bigger)
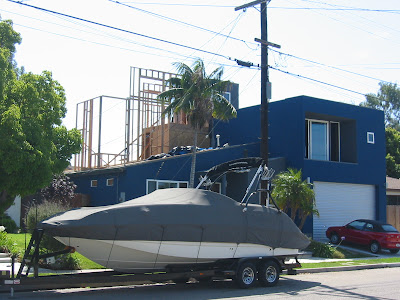
Very astute readers may have noticed in that previous picture that we also have a driveway now. What that means is that we can do this!
 I'll admit at first it was a bit odd parking under that lift with aaaalll those things on it, but I'm used to it already!
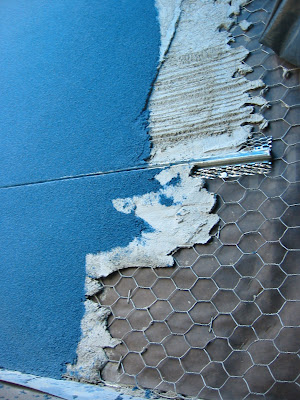
As long as I'm already off-topic, I'll post this here, too: this is just a picture I took thinking of my Dad. It's the various layers of paper, chicken-wire, stucco and top-coat, and I thought it was pretty.
Anyway, back to framing: Sam built and put up another 'laundry room' wall (right in front of you, in this next picture), the left wall of the hallway, another parallam across them. By comparison with some of the others he's put in place, this one was light! Now you can get a sense of what it'll be like as you come up the stairs!
 And then he put in the joists to support the floor, and the floor! So now he could stand in the other part of the cupola!

So of course I had to go stand in the other part of the cupola!!
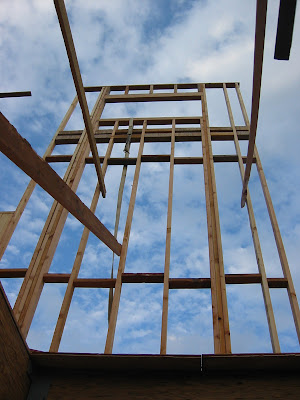
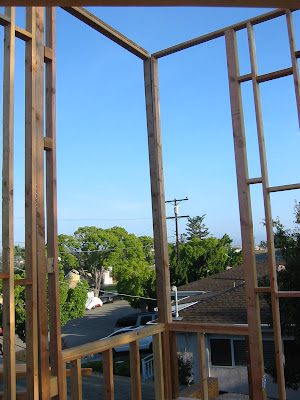
Next, he built and somehow got into place (I was at school so I really have no idea how he did this) another couple of the 'stairwell' walls. Here you can see what the huge windows will look like from the inside!
He also got more cupola walls up...
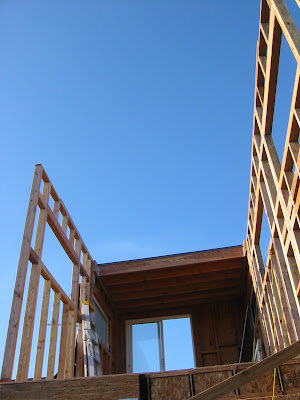
... so now I can stand in the cupola and see aaaaalll the way down to the living room!
We're really beginning to see how it's going to look when it's all done. We think the architects did a great job... it seems to us to be contemporary without being cold, which is exactly what we wanted.
I really didn't do justice to all of the work that Sam has done, but I've given you a taste, at least.
Over the weekend he plans on tackling the remaining huge stairwell/cupola walls... I hope to get you pictures of that next week!

Back at the beginning of July, Sam had to spend a fair amount of time digging in the dirt, getting the drains placed, in preparation for the pouring of the walkway on the side of the house. These drains will collect the rain water that gushes out from those pipes on the side of the house (which is from the roof!).

He also had to spend a lot of time doing his other least favorite thing: climbing around in the rafters, reattaching vents and reorganizing wires...

But he also got to do some more fun stuff. The day after reading a book on "how to build stairs"... he built stairs! These get you up to the bathroom from the garage....

... and these get you into the house!

Sioux took to them immediately.

After Sam had the drains all set, the concrete guys set forms for the remainder of the foundation work inside the house, as well as for walkway...
 ... and then they started pouring concrete!
The walkway on the side of the house is cool... is has jags in it that mirror the angles of the house itself, and we'll be putting river rock in the empty spaces ...

After the foundation was poured, Sam got to (finally!) put (sub)floor back in the living room.
 And then one day he said "honey, I think I'm going to cut a big hole in the roof."
And he did!
He started by creating a support for the bit of roof that was to remain...

... and then started cutting boards with his magical Sawzall, and pulling 'em off...
 A lot of light started streaming into the living room!


As a final step, he and Nathan removed the beams that had supported the roof, leaving us with a spectacular (temporary!) skylight! Thank heavens we live in perennially sunny San Diego!

Next step was to haul into place (and I do mean haul) the big parallams that had been taking up 'my' space in the garage! Sam came up with an ingenious new way to do this: First, they got it placed on a couple of ladders...
 ... then they put a strong tow-strap around it, and they lifted it- slowly and carefully- into place!
(I'm making all of this seem easier than it was, because I have more than a month of information to cover. As an example, I have about 15 pictures of them getting it from the previous picture to the next one. It was hard work.)

Once that first one was in place, Sam nailed a bracket onto it (visible in the next picture), and they got ready to lift another one...


... and once that was done, Sam nailed into place all the mini-beams, which will be part of the ceiling of the living room once they're drywalled. We could really begin to get a sense of how spacious and open the living room is going to feel....
 When I came home from school the next day, Sam had thrown some boards on top of all those beams and was standing up there, on the second floor above the existing house! Just behind him on the right is where the laundry room will be, and on the left is the entry to where the bedrooms are.
 This is a picture of him standing in pretty much the same place, once the tarps were removed. Once he had someplace to stand, he was back to framing. First, he built, and put into place, a part of the wall of the laundry room (on the far right in this next picture)...
Then, he attacked a 20-foot wall for the staircase & cupola. Here it is almost all finished... but he needed some help in order to stand it up!

Luckily the next day Nathan was there, and he helped Sam unload a bunch more wood from Home Depot...

... and then Sam's brother OJ showed up just in the nick of time. I think he had been anticipating a more social visit, but Sam put him right to work!


That is a tall wall!!! We crossed the street to view and admire it from a distance...
(you can click on the picture to make it bigger)

Very astute readers may have noticed in that previous picture that we also have a driveway now. What that means is that we can do this!
 I'll admit at first it was a bit odd parking under that lift with aaaalll those things on it, but I'm used to it already!
As long as I'm already off-topic, I'll post this here, too: this is just a picture I took thinking of my Dad. It's the various layers of paper, chicken-wire, stucco and top-coat, and I thought it was pretty.

Anyway, back to framing: Sam built and put up another 'laundry room' wall (right in front of you, in this next picture), the left wall of the hallway, another parallam across them. By comparison with some of the others he's put in place, this one was light! Now you can get a sense of what it'll be like as you come up the stairs!
 And then he put in the joists to support the floor, and the floor! So now he could stand in the other part of the cupola!
So of course I had to go stand in the other part of the cupola!!

Next, he built and somehow got into place (I was at school so I really have no idea how he did this) another couple of the 'stairwell' walls. Here you can see what the huge windows will look like from the inside!

He also got more cupola walls up...

... so now I can stand in the cupola and see aaaaalll the way down to the living room!

We're really beginning to see how it's going to look when it's all done. We think the architects did a great job... it seems to us to be contemporary without being cold, which is exactly what we wanted.


I really didn't do justice to all of the work that Sam has done, but I've given you a taste, at least.
Over the weekend he plans on tackling the remaining huge stairwell/cupola walls... I hope to get you pictures of that next week!
Subscribe to:
Comments (Atom)
